While working on this turn-of-the-century barrel chair project I've come up with a good motto, one that I'll get to soon but first, to borrow from Paul Harvey, the rest of the story...
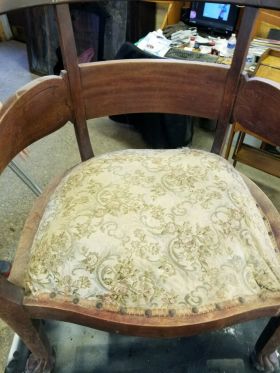
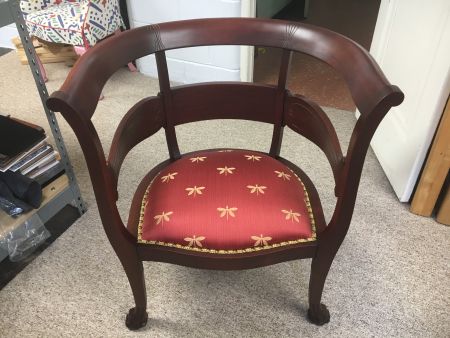
Here's a project I've taken on and at the outset felt as though I'd wrap it up within a week. I mean, how hard can it be, I'm just putting the seat back together - of course there's the unknown issue of needing to 8-way tie the springs underneath the seat based on the "before" picture. Also pictured here is the final product for comparison.
Yes, the before image looks a bit sad and has a few wrinkles but overall how hard could it be to simply replace the covering, put new gimp on, and bang in a few decorative nails? It wasn't as difficult nor time consuming as the last project but this one made me scratch my noggin a few times. I thought I'd approach this project with a systematic approach I might use to solve engineering problems like I do on a daily basis at work. Having torn it apart and 8-way tied the springs, I contacted my mentor and invited him to come share an adult beverage with me presenting an opportunity to ponder the issues this chair would pose. I was pleased when Rollin said I had done a good job with the spring tying - and had I knotted the strings where they crossed outside of the springs I might have even tied them as well as he would have. But by that point my mind was replaying his compliment that my work was "acceptable" and was relishing in the fact he hadn't proceeded acceptable with "not" nor "un" as in this is simply unacceptable!
During conversation over dinner one evening with friends the topic of my interests in upholstery came up. To make a long story short, Dave and Dianne had a favorite mudroom chair in need of attention and asked if I'd be willing to take it on as a project. A few days later Dave dropped it off and Dianne approved of the material I suggested we use.
To describe the chair as "rickety" would be an understatement! I'd guess nearly every joint was loose but, nothing was broken, although one of the rear legs had a slight lateral crack which could be repaired at a future date if deemed necessary. The seat was covered with a hard plastic, I want to say it was vinyl but it looked and felt more like a plastic table top cover from the 1970's - nothing like the soft and supple vinyl upholstery materials available today. The chair was also a causality of being in the wrong place on at least one occasion, it was covered with a white paint overspray, probably from being in a room that was being painted with a roller.
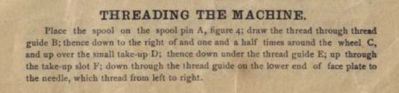
In today’s world of instant information via the internet you would think a quick search would result with the information you are looking for. When you try to find something about an almost 200 year old sewing machine it is not on the side of the Super Information Highway. I would say it is more like information cave exploring. Some of it is out there but you need to dig for it. Go ahead try finding “Thread path for Standard Treadle sewing machine”. Did you realize the Singer Company almost bought up every sewing machine company there was?
So back to the search, as I said it was buried. I finally found a person with a similar machine via Pinterest, noticed they had posted the picture on a forum about vintage sewing machines, so I joined the forum. I posted my question and a member pointed me to a section on the forum that had had a PDF of the original manual. Holy Cow, which is just what I needed. After threading it the correct way I was able to sew two pieces of fabric together. It did take a little more practice at the treadle part though.
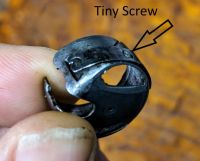
It sewed Ok but still not quite right, so I thought I would have Russ come and look at it. After all he now has two professional machines. After some more test runs he thought we needed more bobbin tension. To adjust this you need to make very, very small turns on a tiny, tiny screw located on the bobbin case. I did mention I unburied the machine in my basement filled with other stuff. So Russ was trying to adjust the tension when I hear, Oh s(*@. I turned and said “What happened”, “I dropped the screw” Russ said with a troubled look. So after about an hour we finally found it with the aid of a good magnet. All we had to do is but it back in. After another search on the floor we decided we should move to a place where the light was better and the floor was not so available. Well after about another hour of trying to reinstall the screw we finally accomplished the task. Unfortunately after all this work we were still not able to tighten the tension any tighter. The bobbin spring is bent too much. Back to the forum to see if I can find a 200 year old bobbin case, I am sure someone has a few laying around.
So all this because I wanted to try thread painting and possibly using a treadle machine to do it. So I will just use the White sewing machine to get started. Stay tuned, I have to get some new thread.
While shopping the other day I ran into a person who for some unknown reason apparently reads the drivel we post for ourselves and asked why I have been so quiet for a couple of months now. I assured her that I've been healthy, and am continuing to learn about upholstery work in my spare time, even during my apparent absence. So, before I try to catch everyone up please remember this adventure is JUST A HOBBY - it's not my day job!!
With that said, several projects have come and gone since my radio silence began. My last post introduced Bambi's Bimini, which I still haven't completed and takes up a considerable amount of floor and table space and one I'd very much like to wrap up. Unfortunately, the bimini project was sidelined due to "other financial considerations" as in, actual paying gigs showing up on my doorstep. Fortunately Bambi and her husband were willing to shift their anticipated delivery date to accommodate my hobby funding opportunities.
Pictured here are a few of the other projects that literally showed up for service. The first as a gift from a husband to his wife who after years of using this chair in their mud room decided to have it restored. Details are available here but the transformation was as wonderful as the gift!
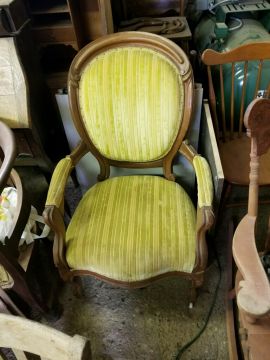
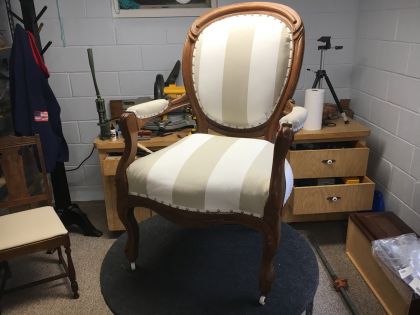
And then there's this chair. Talk about a learning opportunity! In addition to a request for "old school" restoration, applying gimp and securing with decorative nails was a new challenge for me. While it's not a "master's quality upholstery job", I'm not embarrassed with the outcome. Again, before and after pictures.
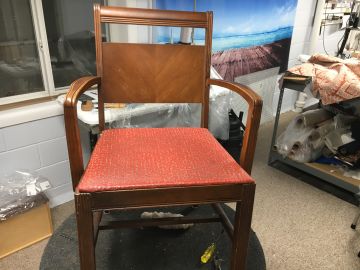
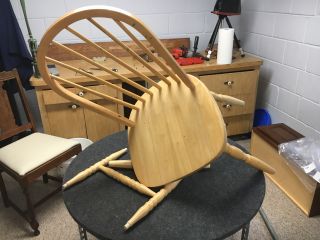
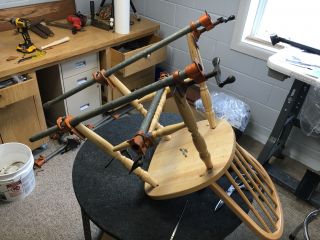
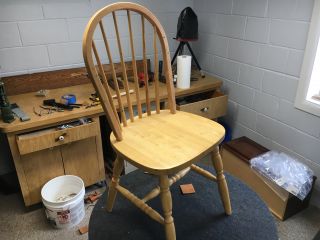
Last, not one, but two wood chairs in pretty much the same condition upon arrival. While not obviously financially viable to repair at the outset, my family members argued that I either fix these chairs or else be prepared to part with my newfound earnings to buy replacements. Ouch! Needless to say, I accepted the challenge of bringing this pair of chairs back to life!
All in all, this hobby is working out quite well! ;-)
I being the artistic one as apposed to Russ being the anal retentive machinist type, have been trying out a few new things. I was doing some research on YouTube about sewing and upholstery and ran across something that caught my eye. Thread painting, some call it freehand or free motion embroidering. I also spotted free motion quilting but that will be for another day.
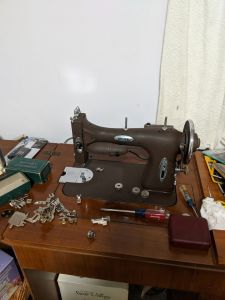
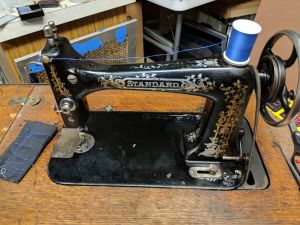
Now let me start off my saying “Free” does not mean you can sit down and just create something. First it take hours of YouTube, there is a lot out there. Then you need tools and equipment, more hours of YouTube research. Now let’s see if I have anything that will work. I do, a 1956 White sewing machine that has not been used in 30 years and a 1826 Standard Treadle machine that is buried in the basement under a sand blaster, that is another story later. Maybe I should buy a new machine, but a quick trip to the Quilting shop sent me back home to the not so modern stuff.
Let’s start with the White Rotary sewing machine. This has been in the family since it was purchased. The receipt in the draw says it was purchased from Yonkers in 1956. This would have probably been my wife’s grandmothers if I had to guess. I could tell by the small drive wheel that was flat on one side it had not been used for a very long time. It was really clean so I purchased a new drive wheel and oiled everything really well. Since I had the original book it did not take too long to learn how to thread it and give it a try. To my surprise it works very well.
Ok, according to YouTube you can do thread painting or free motion quilting on a treadle sewing machine. Check this video out, https://www.youtube.com/watch?v=YEZZj92Gmks . As I mention I just happen to have a treadle machine. So after un-burying it from all the other hobby supplies and tools, I managed to pulled it out to see if it was even an option. Let’s say it was not in the same shape as the White I just fixed up. I managed to clean off the 100 years plus of dirt and grim and made sure it would even move. After some hefty oiling I was ready to put some thread on it and give it try, so I thought.
How difficult could it be, I had bobbins in the drawers that someone maybe a 100 years ago put thread on and there was already a needle in it I just need some thread which was also in the drawer. So you put the spool of thread on the post thing and then under the pin, around the little spiny disk, down through the tension gizmo, through the wire thing then up to the thing that goes up and down and down to another wire loop and then through the unusually small hole in the needle. I grabbed some fabric folded in half and put it under the foot and began to move my feet. At this point I don’t know if it was the thread, the tension, the fact I have no idea what I am doing or what but the thread waded up and broke and the fabric moved back and forth and the machine would not stay moving in any direction. This means more YouTube time. I’ll be back.

 Yes, the before image looks a bit sad and has a few wrinkles but overall how hard could it be to simply replace the covering, put new gimp on, and bang in a few decorative nails? It wasn't as difficult nor time consuming as the last project but this one made me scratch my noggin a few times. I thought I'd approach this project with a systematic approach I might use to solve engineering problems like I do on a daily basis at work. Having torn it apart and 8-way tied the springs, I contacted my mentor and invited him to come share an adult beverage with me presenting an opportunity to ponder the issues this chair would pose. I was pleased when Rollin said I had done a good job with the spring tying - and had I knotted the strings where they crossed outside of the springs I might have even tied them as well as he would have. But by that point my mind was replaying his compliment that my work was "acceptable" and was relishing in the fact he hadn't proceeded acceptable with "not" nor "un" as in this is simply unacceptable!