


Ever notice how manufacturers make bags just large enough to cover the item they produced? And when I say "just large enough" I'm talking about just barely fitting as in you have to wrestle it on and wrestle it again to get the cover off. Have you been there? If so, you'll totally understand how this can be so frustrating, why can't the manufacturers charge a little more and create covers that slip on and off!!! The trivial amount would be well worth it! But I begin yet another rant...
This project is the case of a boat grill cover that was really tight when you tried pulling it on or taking it off the grill, of course it had seen a few summers of full sun and had not only faded but was beginning to look rather tired.
The process in replacing this cover was to first make a pattern, one we could keep in the event someone else would like the same cover, then cut out the pattern in Sunbrella (or similar fabric), insert grommets, sew along the perimeter, turn and sew the hem, and pull the drawstring through. Pictured below are a few of the steps.
The pattern in muslin:

In order to cut the pattern in Sunbrella it's a good idea to use a hot knife cutter - this melts the fabric and prevents unraveling. Here we're showing a hot knife in the form of a woodburning pencil iron but for a more rapid speed I'd suggest a dedicated hot knife ~$130 or a soldering gun with a flattened and sharpened tip. A tip here, always cut on something that can be sacrificed or use a piece of metal, as in the backside of a metal rule, or even a pane of glass. Hot knives can, and will, damage wood table tops!
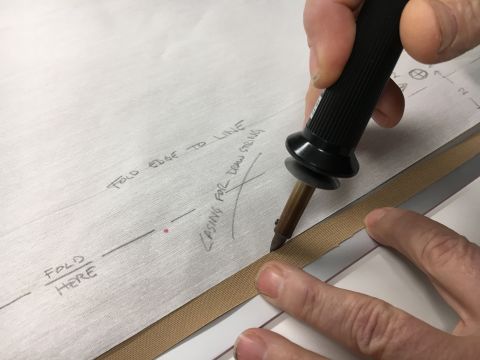
In this image you can see various notes written on the muslin cloth used for the pattern. Comments such as where the hem line should be as well as grommets should be placed are present. While it seems these notes shouldn't be necessary, they are helpful and I suspect they will be really handy next year when we decide it's time to make another grill cover!
Speaking of inserting brass grommets, we used manual cutting and setting tools to create the hole where the grommet is inserted into the fabric. The purpose of these grommets is to provide a smooth surface for the drawstring to run. A better image of the drawstring is shown in the image with the cover on the grill.


With the hardware installed it's time to sew this project together! Basically, you just need to sew the perimeter of the curve, then turn the hem and sew again. To reduce sewing time and make a really nice looking hem, we used basting tape to keep the raw edge in place while sewing the casing.

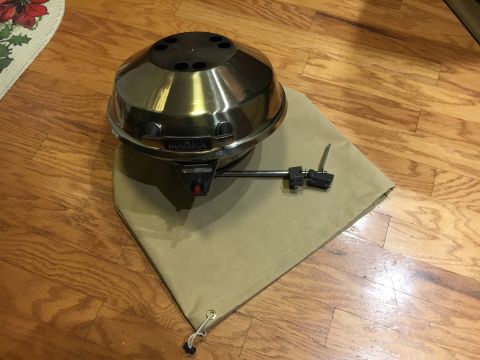
Odd sort of picture showing the grill on the cover, but this way it's easy to see the project. Following is the cover on the grill!
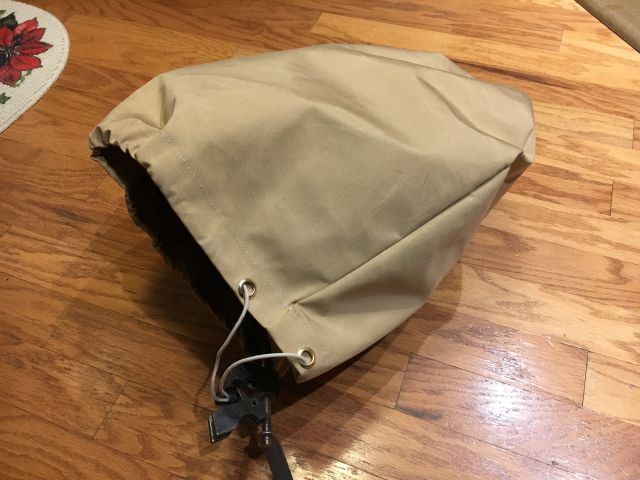
With a bit of effort - and this will eventually happen - the drawstring can be pulled to close the open end of the bag thus encasing the grill.
The bottom line on this completed project is, the owner is thrilled, and if he's happy, we're happy!