

Bambi and her husband upgraded sailboats late last season and decided over the winter to invest in a new bimini so that it would match with their dodger and sail covers. Using the existing bimini as a pattern, we ordered material, seamed it together and learned to sew zippers in place.
Writing this article and looking back, it's amazing how something that looks so simple turns out to be way more complicated than it needs to be! To share a one example, just for fun, you might think it's be a straight forward process to use the original as a pattern - WRONG! Here's why, first, if you look carefully at the picture above and zoom in tightly to the starboard aft corner (that's the back right corner closest to the camera) you might be able to make out wrinkle lines - there are four pleats on each corner, which I carefully replicated. Upon further investigation it appears pleats aren't necessary if the material is cut correctly in the first place. With that said, there is a rather complex set of instructions to be followed, fortunately they are easy to find on the Internet if you know where to look - like this Building a Bimini video from Sailrite on building a bimini for boats for example. Of course, hindsight is always 20/20 and regrettably I made the foolish mistake of working from the original - without first seeing it installed on the frame. Alas, yet another learning opportunity!
Don't misinterpret this, I'm not saying the person who built the original did a bad job or anything, I'm just saying I feel there are better ways to make a bimini than from the pattern I followed. Unfortunately, I'm way to far into this project to back out short of starting over. However, I feel with a few minor alterations I'm reasonably comfortable my friends will be more than satisfied with the finished project. And at this point in my upholstery studies, I'm no stranger to the number on tool in my arsenal, the seam ripper!
Here's a few pictures of the project in process:

The original bimini is laid on top of Sunbrella that has been seamed laterally using a full-felled flat seam and hot-cut along the sides (using a hot knife to "cut" acrylic is the preferred method, this reduces the likelihood of the fabric unraveling). The full-felled flat seam is a great seam for both strength and water resistance but by all accounts is overkill for this project.
The ends have been pleated to match the end curves of the pattern. Here you might think this is a simple task of simply making the pleats, but if you want to do it right, there's a process to follow that involves measuring, and matching, the curveature of the frame's bow - doing so will eliminate the need of the pleating but requires knowledge and a fair amount of patience.
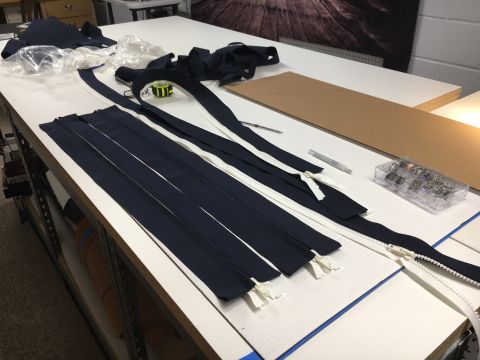
Pictured here are the many zippers used to attach the cover to the frame bows. The frame for this boat uses four bows, the two inside use 36" zippers whereas the end zippers are significantly longer. Knowing what I do now, I'd opt for using shorter zippers on the ends, using two instead of one long one - this would make it easier to install and a lot easier to sew into place.
To prevent rusting and other issues we chose to use YKK #10 white finished zippers. For those lacking in zipper-speak, let it suffice there's a ton to know about a simple zipper! However, YKK the world's leading manufacturer of zippers - according to their website the produce about 50% of the world's demand for zippers, cranking out about 7,000,000,000 - yes, seven billion, zippers annually!
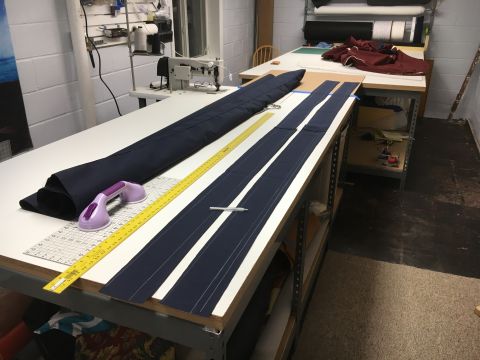
With the zippers ready, the bimini is rolled so that it'll feed under the sewing machine arm. We're fortunate to have over 20 feet of table space to work on which makes sewing a project of this size reasonably easy - it's mostly an exercise in material management.
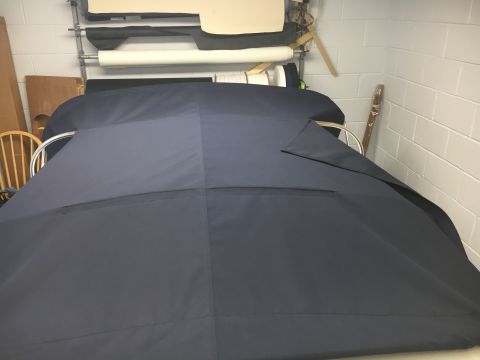
With the bimini stretched over the frame we can see it's not stretched quite as much as I'd like however, zippers that allow back stay cables still need to be installed and I'm please to say after the zippers were sewn in the overall fabric tautness looked a lot better.
The only troubling aspect that still needs to be addressed is the curvature of the end bows. I've recruited the assistance of a long-time upholsterer who has some canvas experience in his background to guide me in the necessary alterations. Those changes have been chalked but not yet implemented. The good news is, a couple more hours of work on this project should wrap it up.